Add media
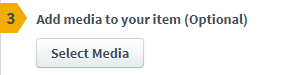
To associate media with an item, click Select Media in section 3 of the Item Authoring window.
Working within the
You can associate up to 30 assets with each item. The system will accept virtually any image or video file, but will not display file types such as MS Word or Excel files in the browser.
The contents of the
Viewing media in an item
Attached media displays by default in Preview mode.

In Edit mode:
-
Click the expansion icon to the right of the thumbnail to view an enlarged version of the item.
-
Click the Media ID to open the image or video in the

To return to the thumbnail view, click the expansion control in the expanded window.
Reorder item media
If you need your assets to appear in a specific order, there are two ways to reorder them in section 3 of Item Authoring.
-
Remove all of the assets from your item and add them again in the correct order.
-
Replace assets individually so that they appear in the correct order.
Replace item media
To replace an asset in the item with a different one from your collection folder, click the asset to be replaced to reopen

Add the replacement media from the Media Library, or upload new media as necessary.
Once you submit media to an item, the
If the ![]()
Remove media from an item
Remove selected assets from an item by clicking the X at the right side of the asset thumbnail.

Removing media from an item does not remove the asset from the
©Copyright NBME 2024